Thursday, February 12, 2015

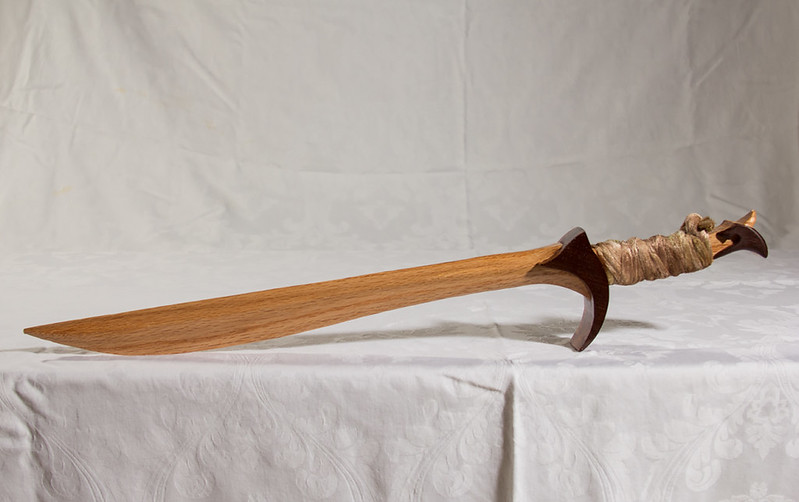
Wooden Orcrist


This entry is a bit late, but I only recently realized that I hadn't posted it to this blog.  My daughter decided to dress as a pirate for Halloween 2014.  She had the basic costume, and I decided to make a sword to add that final touch.  This was partly inspired by a video I saw on YouTube from another woodworker, Paul Jenkins.

Saturday, January 17, 2015

Cabinet Organization

I have a section of cabinets dedicated to "fasteners."  In this area I keep all my nails, screws, glue, biscuits, and other assorted things that hold one piece of wood to another.  Although it's nice to have all of these things in one place, having a stack of boxes for nails and screws isn't terribly convenient.  The laws of woodworking dictate that the screw you need is always the box at the bottom of the stack, and there are no exceptions to this rule.  This means that whenever I need a box of screws, I have two options: 1, try to delicately remove the bottom box from the stack; 2, just take all the boxes out to get the one I need.


I decided it was time to build a simple rack to store all of the boxes of nails and screws so that whenever I need a particular size nail or screw, all I have to do is grab the one I need.

Saturday, November 1, 2014

Quick Project: Ladder Hanger

Today's project is a quick one; it only took me about an hour from start to finish.  Inspired by a recent video from April Wilkerson, I decided to hang my ladder from the ceiling instead of using valuable wall space.

April used fairly sturdy angle brackets and a threaded rod to hold her ladder.  Instead of making a trip to the hardware store to pick up the parts, I scavenged what I could find around my workshop.  In the end, I opted for slightly less rigid angle brackets, and I used a 1/2 inch dowel instead of a threaded rod.  My step ladder isn't very large, nor is it too heavy, so I should be able to make do with what I have.  I doubled up on the angle brackets just to be on the safe side.


Saturday, September 6, 2014

Laundry Room Shelves: Finished (for now)

The laundry room shelves are pretty much done, so I'm calling this project complete. I still have a few more shelves to make, and I'm eventually going to remake the ironing board holder, but for the purposes of this blog there isn't much more to show.


Saturday, August 30, 2014

Laundry Room Project: Part 2

I made some progress on the laundry room organization project.  I started with a few long scrap pieces of oak plywood and cut several 3.75 inch wide strips.  I then set my table saw to cut a 45 degree angle and ripped each strip down the middle.  That gave me several french cleats that measure 2 inches on the long side, and 1.25 inches on the short side.

Sunday, August 17, 2014

After A Break, A New Project

It's been a while, but I was on a bit of a hiatus while I helped my parents build a gazebo in their backyard. I don't have a project log for that since it wasn't really my project; I was just the hired labor.
I've decided that our laundry room needs an organizational makeover. Since we moved in the room has always felt small, and there isn't any good space for organizing the various things that ultimately end up in a laundry room. There are a couple of basic wire shelves, and those do well enough for storing a few things, but the room (and the washer and dryer) both end up cluttered with miscellaneous household items.
After thinking about how to better organize the space, I saw a video on YouTube by another woodworker - Frank Howarth - who was facing a similar problem in his broom closet. I really liked his french cleat system because it not only provides multiple possibilities to organize things, but it also looks very nice. I drew on his idea for inspiration and came up with my own idea to fix my laundry room.


As you can see from the above drawing, I plan to build a system of french cleats on the room's long wall, starting near the floor and moving up to the ceiling. The cleats follow the area around the washer and dryer, and at the top there is a space for the clothes hanger. I thought about removing the existing wire shelves, but in the end I decided to leave them. They work well enough, and I'm not looking to add a whole lot of organizing space - just more than I currently have. The french cleats measure 2 inches tall and 3/4 inches thick. I'll cut them from some scrap plywood from previous projects. I will cut strips that are 3.75 inches wide, then make a single 45-degree cut along the center to get two french cleats that measure 2 inches on the long side. Frank attached the cleats to a piece of 1/2 inch plywood, then attached the completed board to the wall. Due to the limited existing space, I'm going to attach my cleats directly to the wall. One or two screws going into each stud behind the wall should provide enough holding power for the cleats.

I recommend watching Frank's other videos. Aside from being a good woodworker, he also has an interesting way of telling the story of each project. His videos are very creative.
More to come soon.
Wednesday, June 25, 2014

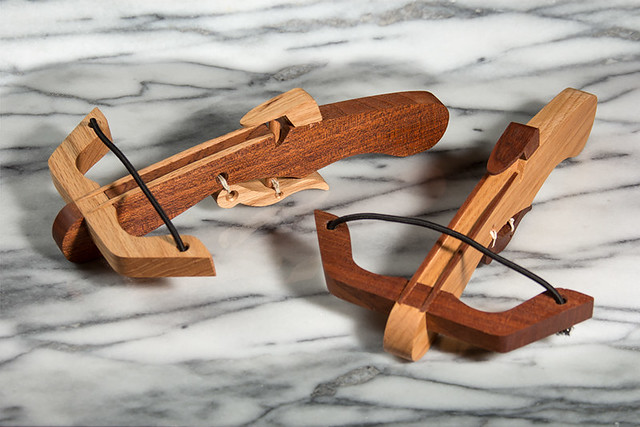
Marshmallow Crossbows


I completed the "marshmallow crossbows." I got the idea (as well as the plans) from Steve Ramsey, and these were actually pretty fun to build. Most of my woodworking isn't done at this scale, so I used the project as an opportunity to develop my skills with hand tools. I cheated a bit on a few parts, but I used a coping saw, chisels, a file, and sandpaper wherever possible. Technically I believe these are slingshots because the power comes from the elasticity of the cord rather than the flex of the bow, but the name is really more of a reference to the shape. Plus, they're toys so it doesn't really matter anyway.